

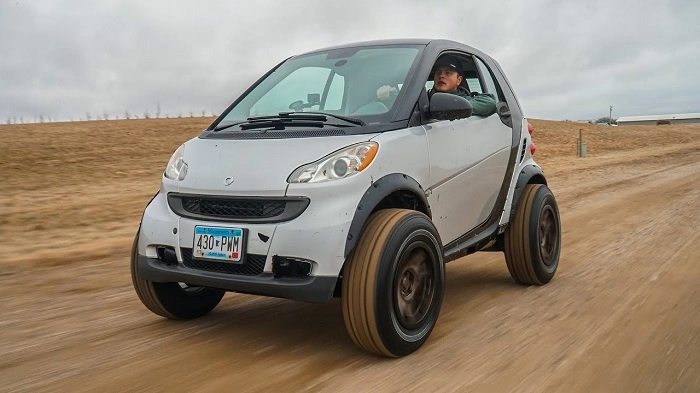
A lifted smart car shouldn’t make sense. And yet it does. The little city cube gets taller shoes, a touch of altitude, and suddenly it looks adventurous—like a backpacker with fresh boots. You gain curb confidence. Pothole immunity. Gravel-road curiosity. And yes, a lot of smiles at red lights. This guide walks you through why and how to lift a Smart Fortwo (and its cousins), what parts to use, which sizes play nice, what can go wrong, and how to keep the whole thing safe, street-legal, and fun.
Why Lift a Smart Car?
- Real-world clearance. Speed bumps, rutted alleys, snow berms, steep driveways—gone from drama to shrug.
- Tire choice. A small lift unlocks slightly bigger, tougher rubber with better sidewalls.
- Stance and style. It’s charming, unique, and Instagram-friendly without trying too hard.
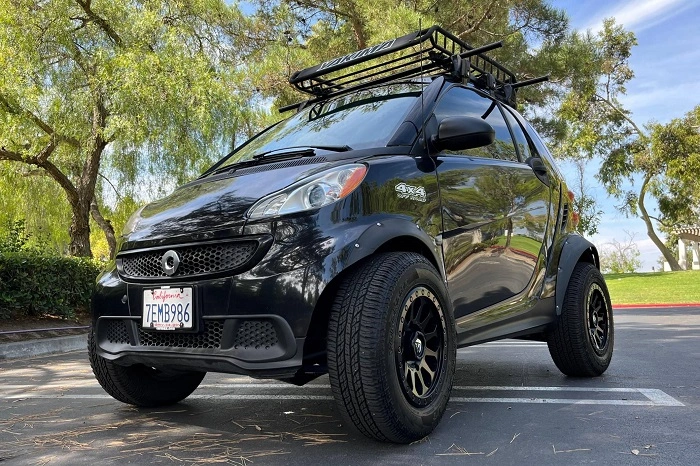
- Camping and dirt roads. Forest gates and gravel lots stop feeling like a gamble.
If you’re here for a rock-crawler, this isn’t that. A lifted smart car is about light exploration and urban survivability, not boulder fields.
Which Smart Models Lift Best?
- 450 (1998–2007, Europe)
Early, light, and simple. Parts are more niche, but the platform responds well to mild lifts.
- 451 (2008–2015, U.S. and global)
The common U.S. hero. Rear-engine, rear-drive. Plenty of community knowledge. Great candidate for a 1–2 inch lift with modest tire upsizing.
- 453 (2016–present global; U.S. until 2019)
Newer chassis tuning, still rear-engine/rear-drive. More electronics to mind. Comfortable with conservative lifts and careful tire math.
Pick the cleanest car you can find. Rust and tired bushings multiply the pain of any suspension work.
Lift Methods: What Actually Works
Spacer Lifts (Most Popular)
Poly or aluminum spacers sit on top of the struts/springs to raise ride height 1–2 inches. They preserve stock spring rates, keep ride quality friendly, and are reversible.
Pros: Affordable, quick, OEM-like comfort.
Cons: Suspension travel doesn’t increase; geometry changes slightly at the new static height.
Spring/Strut Swaps
Stiffer, slightly longer springs paired with fresh dampers can add lift and control. Think “rally-ish” firmness without teeth-chatter.
Pros: Better body control, crisper response.
Cons: Costlier, and tuning mismatches can make the car fidgety.
Custom Fabrication (Niche)
Longer dampers, modified mounts, or fabricated subframe spacers. A rabbit hole for experienced builders only.
Pros: Tailored stance and travel.
Cons: Complexity, alignment challenges, and potential for parts-sourcing grief.
Wheels and Tires: Sizes That Play Nice
Stock 451 stagger: 155/60R15 front, 175/55R15 rear. Tiny, efficient, and fragile-looking. A lift lets you go a little taller and tougher while staying civil.
Reasonable “lifted smart car” targets (451/453):
- Front: 165/65R15 or 175/65R15
- Rear: 185/60R15 or 195/60R15
Those combos add sidewall without turning the car into a rubbing machine. If you run 16s, keep overall diameter similar to the 15-inch upgrades and watch offsets.
Offsets and width:
- Narrow wheels (5–6 inches) with modest positive offset help avoid fender rub and strut kisses.
- Aggressive pokes look cool but can stress bearings and invite rubbing at full lock.
All-terrain patterns:
Mild A/T tread exists in smaller sizes; choose light-duty patterns to avoid noise and rolling resistance. Remember: more tread block = more hum.
Clearance: Where the Rubbing Happens
- Front inner sidewall vs. strut spring perch. A few extra millimeters of offset or a thin spacer can rescue clearance, but don’t go wild.
- Front fender liner at full lock and compression. Trim gently if needed; heat and reform is cleaner than hacking.
- Rear arch and bumper tab. Taller rears can graze the plastic under squat; inspect after your first drive.
- Brake hoses and ABS wires. After any lift, turn the wheel lock-to-lock and compress the suspension to confirm free play.
A little patience here saves tires and nerves later.
Alignment and Geometry: Keep It Friendly
A lifted smart car changes static camber and toe. That’s normal. What matters is resetting alignment after the lift:
- Front: Aim for near-zero toe, mild negative camber (don’t chase track specs).
- Rear: Keep toe within factory range; too much rear toe-out makes the car darty on highways.
- Steering angle sensor/ESC: Some cars need a quick calibration after suspension work so stability control behaves.
If the shop shrugs at a Smart, bring factory alignment specs and a smile. It’s just another car with a personality.
Drivetrain, Brakes and Bearings
- CV/Axle angles: Mild lifts are fine, but don’t chase 3+ inches. Angles grow, boots stretch, grease gets hot, and wear accelerates.
- Wheel bearings: Wider track and heavier tires add load. Use quality bearings and torque lugs properly.
- Brakes: Taller, grippier tires ask more of the system. Fresh pads and rotors (quality, not bargain bin) restore confidence.
Gearing, Speedometer and Range
Taller tires effectively “gear up” the car:
- Acceleration: Slightly softer launch, earlier upshifts on automated manuals, more shifting on grades.
- Speedo error: Bigger diameter reads slower. Do the math: New diameter / Old diameter = % change. A 4% taller tire means 60 mph indicated ≈ 62.4 mph actual.
- Fuel economy: Expect a modest drop from aero drag and tire mass.
Ride, Noise and Vibes (NVH)
- Ride: More sidewall = cushier hits; stiffer springs = tighter control. Find your balance.
- Noise: All-terrain patterns hum. Rotations and proper pressures help.
- Vibes: If you feel new vibration, check wheel balance first, then alignment, then driveline angles.
Legal, Insurance and Inspection
- Wheel poke laws: Many regions require tread to sit under the fender. Add discreet flares if needed.
- Bumper/lighting height: Don’t lift so high that your headlamps mis-aim. Re-aim after the lift.
- Speedo accuracy: Not always mandated, but helpful for tickets and sanity.
- Insurance: Tell them. Hidden mods risk claims. Declared mods keep coverage clean.
Parts Shopping List (A Smart Starter Kit)
- Spacer kit or spring/strut set designed for your generation
- Fresh top mounts and bump stops
- Quality struts/shocks if yours are tired
- Modest-upsize tires and compatible wheels
- Stainless brake lines (optional) and fresh fluid
- Alignment bolts (eccentrics) if your model needs extra camber range
- Torque wrench, spring compressors (if swapping springs), jack stands
Budget and Timeline
- Spacer-only lift: Parts $200–$500, labor 3–6 hours if you’re methodical.
- Springs + dampers: Parts $500–$1,000+, labor 5–8 hours.
- Wheels/tires: $600–$1,200 depending on taste.
- Alignment: $100–$200.
Do it over a weekend with a friend. The second side always goes faster.
Step-by-Step (High Level)
- Measure current hub-to-fender heights and note them.
- Lift safely, remove wheels, and photograph hose/wire routing.
- Swap spacers or springs/struts one corner at a time.
- Recheck brake-line slack and ABS wire slack at full droop.
- Reinstall wheels, set the car on the ground, bounce to settle.
- Torque lugs to spec with the car on the ground.
- Drive gently to the alignment shop; recalibrate steering angle if needed.
Use Cases That Shine
- Winter towns: Extra clearance + proper winter tires = fewer plow-scrape moments.
- Beach parking and campgrounds: Sand-adjacent lots, rutted entries, grassy festivals.
- Urban life: Construction zones, cratered alleys, lofty curb cuts.
- Road-tripping light: Roof box, soft roading, scenic detours without the “ugh, can we make it?” question.
Maintenance After the Lift
- First 100 miles: Retorque lugs, recheck fasteners, inspect for rub marks.
- Every oil change: Peek at CV boots, brake hoses, tire shoulders.
- Tire rotations: Every 5–6k miles. Small tires feather quickly if toe drifts.
- Alignment check: Twice a year if you drive rough roads.
Common Mistakes to Avoid
- Too tall, too fast. Over-lifting ruins geometry and feels worse. Start with 1–1.5 inches.
- Huge tires on stock wheels. Diameter and width both matter; a little is plenty.
- Skipping alignment. Your hands and tires pay the price.
- Ignoring brake lines and ABS wires. Stretch one and you’ll learn the hard way.
- Buying by looks alone. Cheap tires and dampers make a fun car feel old.
If You Want the Look Without the Wrenching
- Slightly taller tires only. Even +3–4% diameter adds comfort and style.
- All-season with tougher sidewalls. Gains feel without NVH penalty.
- Skid plate and mud flaps. Visual “adventure” cues plus real-world protection.
Should You Lift a Smart Car? The Honest Take
If you love light cars, smile at oddball builds, and crave a little more clearance for everyday life, a lifted smart car is a delightful project. Keep it modest. Keep it tidy. Align it right. You’ll end up with a city rover that threads traffic like a bicycle, parks anywhere, and treats crummy roads like a joke. It won’t climb Moab. It will lift your mood.
FAQs
How high can I lift without headaches?
About 1–2 inches on most Smarts is the sweet spot. Higher invites axle angles, rubbing, and alignment drama.
Will bigger tires kill my mileage?
Expect a small drop. Taller, knobbier tires add weight and drag. Choose moderate sizes and keep pressures correct.
Do I need to re-aim headlights after lifting?
Yes. You’ve changed the car’s rake. A quick aim prevents blinding others and keeps you legal.
Can I daily-drive a lifted smart car?
Absolutely. With a proper alignment, quality tires, and fresh dampers, it’s an easy, cheerful commuter.
What breaks first if I overdo it?
CV boots, wheel bearings, and inner tire shoulders. That’s why modest lift + alignment is the recipe.